I have been asked to take some pictures to show how I fit my stormtrooper costume into my suitcase, a Samsonite 125 litre. Here we go! :)
First, you put the blaster in the holster, and put them in the suitcase. Then you cover the blaster and the bottom of the suitcase with a blanket, if you want to save the armour from scratches.
href="https://blogger.googleusercontent.com/img/b/R29vZ2xl/AVvXsEiFzne14H2ZHzwYOrKsx6xL9NzBAO8V4n7pnl5kK76GLCHQwoOdmK37RyRAmFrgvnehZYk0We1urkFx8mj7Crz1Kth07bBKazd5m2gfmlHwwM0esKDQn86C2yNT0jfYoau5p4I2p5IwNPA/s1600/IMG_8233.JPG">

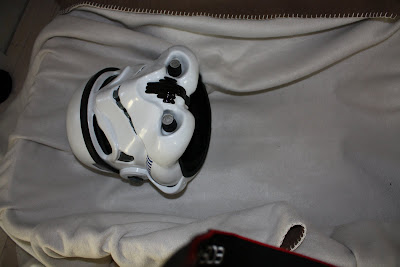
Next, you put the helmet in the bottom, facing up.
Then you put the codpiece (cod pointing at the helmet), butt/kidney (butt pointing at helmet), chest (shoulders pointing at helmet) and back plate (shoulders facing the bottom of the suitcase)

Next, you put the lower arms inside the shins, and then you put the shins inside the thighs. Place the thighs on top of the torso pieces with the knees pointing at the bottom of the suitcase.

Put the biceps in the shoulder bells, and place the thermal detonator inside. Place these beside the helmet.

Tuck the belts, the undersuit, neckseal etc. in where it fits, for example beside the thighs.

Put the boots in shoe bags, and place them beside the helmet with the soles against the suitcase wall.

Last, you just close the lid careful, and you should be done! :)